Best Homemade Kettle Corn Recipe: Expert Tips for Success
There's something undeniably magical about kettle corn. That perfect alchemy of sweet and salty, the satisfying crunch, the way it instantly transports you to bustling state fairs and lively carnivals. For years, this beloved snack seemed like a treat reserved for special occasions or vendor stalls. But what if we told you that achieving that nostalgic flavor profile at home is not just possible, but incredibly simple? Get ready to discover how to make the easy homemade kettle corn that will become your new go-to snack.
Forget the myth that kettle corn requires specialized equipment or complicated techniques. With just a few basic ingredients and a sturdy pot, you can whip up a batch of this irresistible delight in under 10 minutes. This comprehensive guide will walk you through everything you need to know, from selecting the right kernels to mastering the essential shaking technique, ensuring you achieve that iconic sweet and salty crunch every single time. Prepare to elevate your movie nights, game day gatherings, or simply your afternoon snack game with this simple yet sensational recipe.
Unlocking the Magic: What Exactly is Kettle Corn?
At its heart, kettle corn is a delightful twist on classic popcorn. The key difference lies in its preparation: while regular popcorn often gets its flavor after popping, kettle corn introduces sugar and salt directly into the cooking process alongside the kernels and hot oil. This simultaneous cooking creates a subtle caramelization of the sugar onto each kernel as it pops, resulting in a unique sweet and salty coating that defines its signature taste and texture. It’s not overly sweet, nor is it overwhelmingly salty; it's a harmonious balance that makes it incredibly addictive. This contrast is what sets it apart and makes it such a sought-after treat, a testament to the simple brilliance of combining basic pantry staples for extraordinary results.
Gather Your Essentials: Simple Ingredients for Sweet & Salty Perfection
One of the beauties of making fair-style kettle corn at home is the minimal ingredient list. You likely have most, if not all, of these in your pantry already. Quality ingredients, even in their simplicity, make a difference.
- Popcorn Kernels: The foundation of our snack! You'll need unpopped kernels, not pre-packaged microwave popcorn. While any good quality popping corn will work, many enthusiasts, including us, prefer white popcorn kernels for their slightly smaller, more tender texture. Yellow kernels tend to produce larger, fluffier popcorn. The choice is yours, but ensure they are fresh for optimal popping.
- Cooking Oil: This is crucial for heat transfer and even popping. Vegetable oil (like canola or corn oil) is a fantastic neutral choice that won't interfere with the classic kettle corn flavor. Coconut oil is another excellent option, offering a subtle, complementary aroma and flavor, especially if you plan on adding other fall spices like cinnamon. Avoid olive oil, as its low smoke point isn't ideal for the high heat required.
- Granulated Sugar: The "sweet" in sweet and salty. Regular white granulated sugar is perfect for achieving that delicate caramelization. It melts quickly and adheres well to the popping kernels. For a deeper, richer molasses note, you could experiment with brown sugar, but be mindful that it can scorch a little faster due to its moisture content.
- Fine Salt: The "salty" component. A fine-grain salt (like table salt) is recommended over coarser salts. Its smaller crystals will dissolve and distribute more evenly over the popcorn, ensuring every bite gets that essential savory counterpoint to the sweetness.
Mastering the Method: Your Step-by-Step Guide to Easy Homemade Kettle Corn
Making truly great easy homemade kettle corn is less about complex steps and more about precise timing and a crucial technique: constant motion. Here's how to achieve perfection:
The Right Equipment Makes a Difference
Before you even grab your kernels, select the right pot. A large, heavy-bottomed pot with a tight-fitting lid is essential. We recommend a sturdy stainless steel or aluminum soup pot that's at least 10 to 12 inches wide at the base and about 8 inches tall. The wide base allows for an even spread of kernels, and the height provides ample room for the popcorn to expand without overflowing. A heavy bottom ensures even heat distribution, preventing hot spots that can lead to burnt sugar. Important: Avoid using a cast iron Dutch oven. While great for many dishes, cast iron retains too much heat, which can easily scorch the sugar in this application. A clear glass lid is a bonus, allowing you to monitor the action without releasing steam.
The Popping Process: From Kernels to Crunch
- Test the Oil Temperature: Begin by adding your chosen oil to the pot over medium heat. To ensure it's at the perfect temperature, add just 3 popcorn kernels to the oil, cover, and wait. As soon as those three kernels pop, you know your oil is ready. This prevents premature burning of the sugar and ensures efficient popping.
- Add Kernels, Sugar, and Salt: Once the oil is hot and those test kernels have popped, remove them if you wish. Immediately add the rest of your popcorn kernels, along with the granulated sugar and fine salt. Stir everything together quickly with a wooden spoon or spatula to ensure all kernels are coated evenly. This initial coating is vital for the signature sweet-and-salty balance.
- The Essential Shake: This is the secret weapon for perfect kettle corn. Place the lid securely on the pot. Once the kernels begin to pop vigorously, start shaking the pot continuously and carefully back and forth over the heat. The constant motion prevents the sugar from settling at the bottom and burning, ensuring it caramelizes evenly onto the kernels. It also helps agitate the kernels, leading to fewer unpopped "old maids."
- Listen and Continue Shaking: Keep shaking the pot over medium heat. You'll hear the popping intensify, then gradually slow down. Continue shaking even as the popping becomes less frequent.
- Remove and Finish: The moment the popping sounds slow to about 2-3 seconds between pops, immediately remove the pot from the heat. Keep the lid on and give it one final, vigorous shake for another 10-15 seconds. This allows any remaining kernels to pop using residual heat and ensures the sugar coating is evenly distributed.
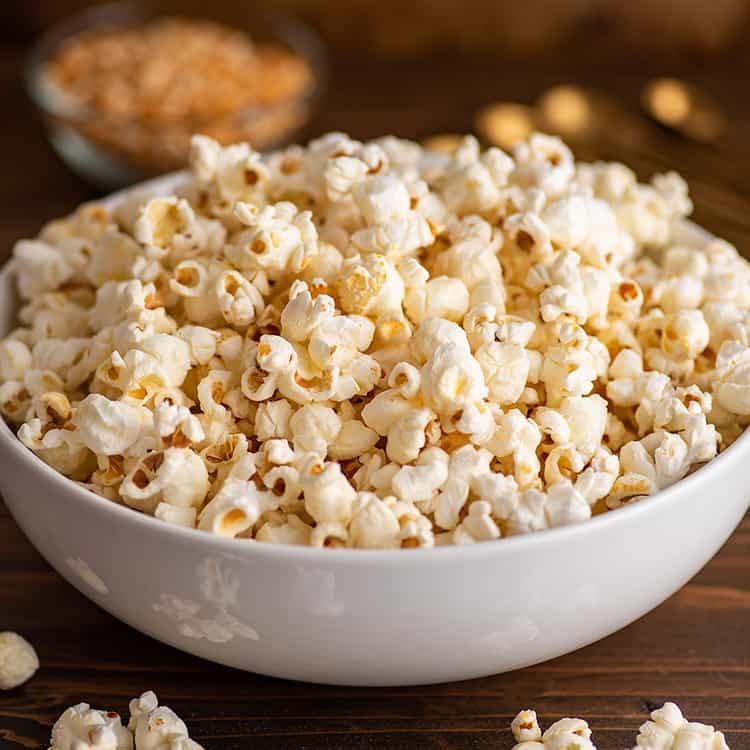
- Cool and Serve: Carefully pour the freshly popped kettle corn onto a large sheet of parchment paper or a baking tray lined with silicone. Spread it out into a single layer to cool slightly. As it cools, the sugary coating will crisp up. Once it's cooled to touch, break apart any clumps and it's ready to enjoy!
Expert Tips for Kettle Corn Success
Achieving consistently perfect easy homemade kettle corn involves a few insider tricks that elevate your results from good to gourmet.
- Don't Overcrowd the Pot: Resist the urge to make a super-sized batch in one go. Overfilling the pot prevents the kernels from popping efficiently and makes even shaking difficult, leading to burnt sugar and unpopped kernels. It's better to make two smaller batches than one compromised large one.
- Shake Like Your Life Depends On It (Almost!): We can't stress this enough. Constant, vigorous shaking once the popping begins is the single most critical step. It’s what prevents the sugar from scorching at the bottom of the pot and helps distribute the heat and sugar evenly among the kernels.
- Immediate Transfer is Key: As soon as your kettle corn is done, get it out of the hot pot. Leaving it in the pot, even off the heat, can cause the bottom layer to overcook or become soggy from trapped steam. Pouring it onto parchment paper immediately helps it cool down and crisp up properly.
- Mind the Unpopped Kernels: While striving for zero unpopped kernels is ideal, a few might always sneak through. Be diligent and try to pick them out before serving. Biting into a hard unpopped kernel can be an unpleasant surprise and even a dental hazard.
- Flavor Variations & Add-Ins:
- Cinnamon Sugar: For a delightful twist, sprinkle a mixture of cinnamon and a little extra sugar over the kettle corn immediately after pouring it onto the parchment paper.
- Brown Sugar Swap: While white sugar is traditional, substituting some or all of it with light brown sugar can add a deeper, molasses-rich flavor. Be extra vigilant with shaking, as brown sugar can scorch a bit faster.
- Fun Toppings: Once the kettle corn is fully cooled, feel free to get creative! Gently toss in mini chocolate chips, M&M's, sprinkles, or even finely chopped nuts for extra texture and flavor. These additions are best incorporated after popping to avoid melting or burning.
- Storage: While best enjoyed fresh, leftover kettle corn can be stored in an airtight container at room temperature for 1-2 days. It might lose a bit of its crispness but will still be delicious.
Troubleshooting Common Kettle Corn Conundrums
Even with the best intentions, you might run into a few issues. Here’s how to address them:
- Burnt Sugar: This is usually a sign of insufficient shaking, too high heat, or leaving the popcorn in the pot for too long. Ensure your heat is medium, shake continuously, and remove the pot promptly.
- Too Many Unpopped Kernels: This can be due to old kernels, not enough oil, or uneven heat. Make sure your oil is hot enough before adding all kernels, and again, shake well.
- Soggy Kettle Corn: If your kettle corn lacks that desired crispness, it might be due to trapped steam. Ensure your lid is not letting too much moisture condense back into the pot, and always spread it out immediately to cool after popping.
Conclusion: Your Homemade Kettle Corn Adventure Awaits
Gone are the days when delicious kettle corn was solely a fairground fantasy. With this comprehensive guide, you now possess all the knowledge and expert tips to create the easy homemade kettle corn that rivals any professional batch. The combination of simple ingredients, the magic of constant shaking, and a few clever techniques transforms ordinary kernels into an extraordinary snack. So, gather your ingredients, fire up your stove, and get ready to fill your home with the irresistible aroma of sweet, salty, and perfectly crunchy kettle corn. It's more than just a snack; it's a nostalgic treat made fresh, warm, and with love, right in your own kitchen.
